
Installation
Prerequisites
Before you connect, make sure you have:
- An Attentive account with beta access enabled. The MCP server is in beta and must be turned on for your company. If you are not sure whether your account has access, contact your Attentive account team.
- A supported MCP client. The beta is validated with Claude Code and ChatGPT Codex. Other MCP-compatible clients can connect using the generic instructions below.
- Appropriate Attentive permissions. Your assistant's available tools reflect your UI permissions, so make sure your Attentive user has access to the companies and features you want to work with.
Setup and installation – All clients
The server communicates over streamable HTTP. By default, it connects in read-only mode. To enable write actions, append ?readOnly=false to the URL.
Use one of the following Attentive MCP server URLs:
Read only:
https://attentive-ui-mcp.attentivemobile.com/mcpRead + Write:
https://attentive-ui-mcp.attentivemobile.com/mcp?readOnly=falseClaude Desktop App
-
Open Claude Desktop and select Settings.
-
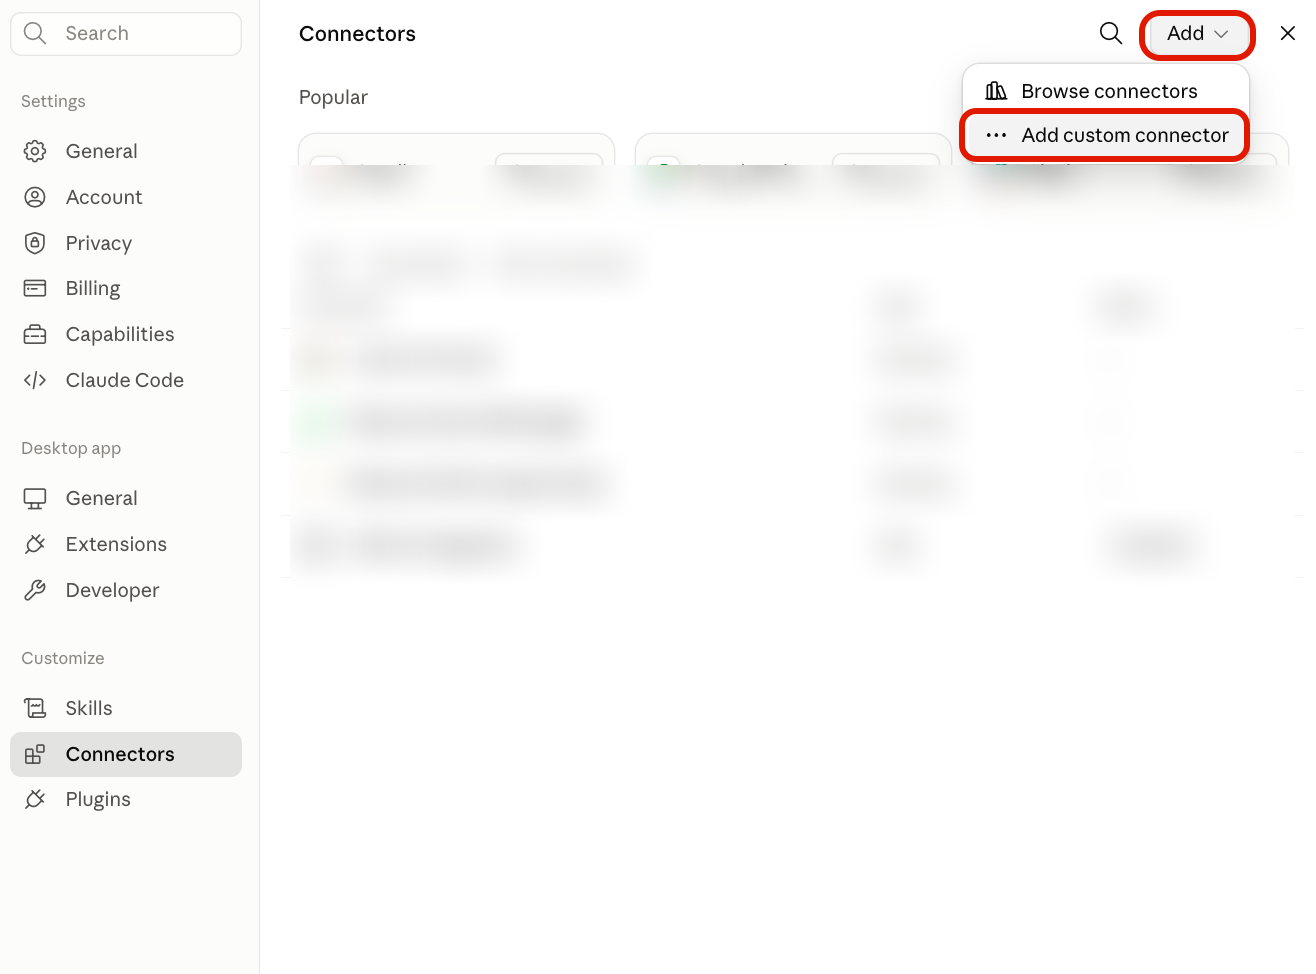
Select Connectors.
-
Select Add, then Add custom connector.
-
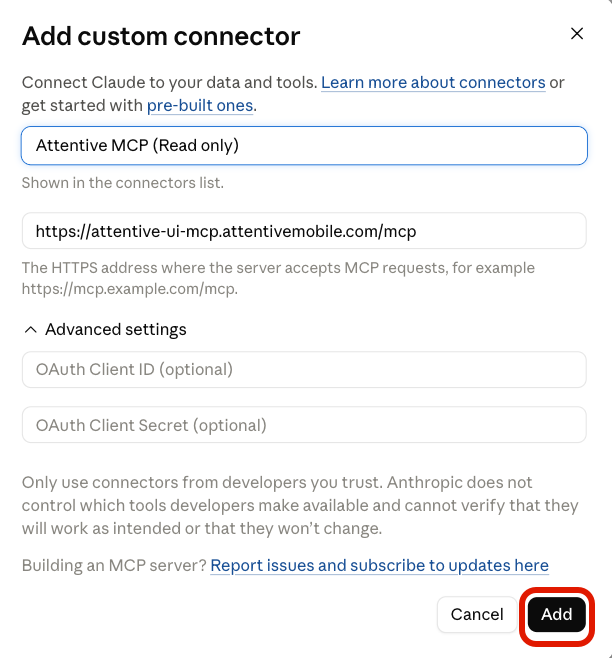
Enter the following details:
- Name:
Attentive MCP (Read only)or another name that identifies the connection. - URL: Paste the read-only or read + write URL above.
- OAuth Client ID and OAuth Client Secret: Leave both fields blank.
- Name:
-
Select Add.
-
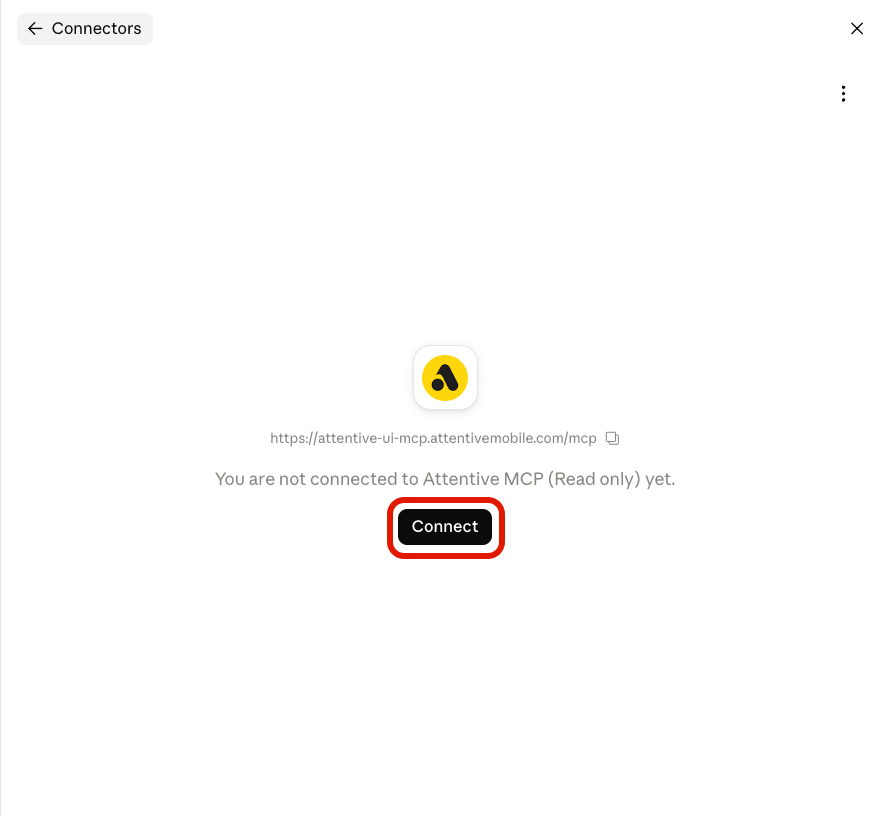
Select Connect.
-
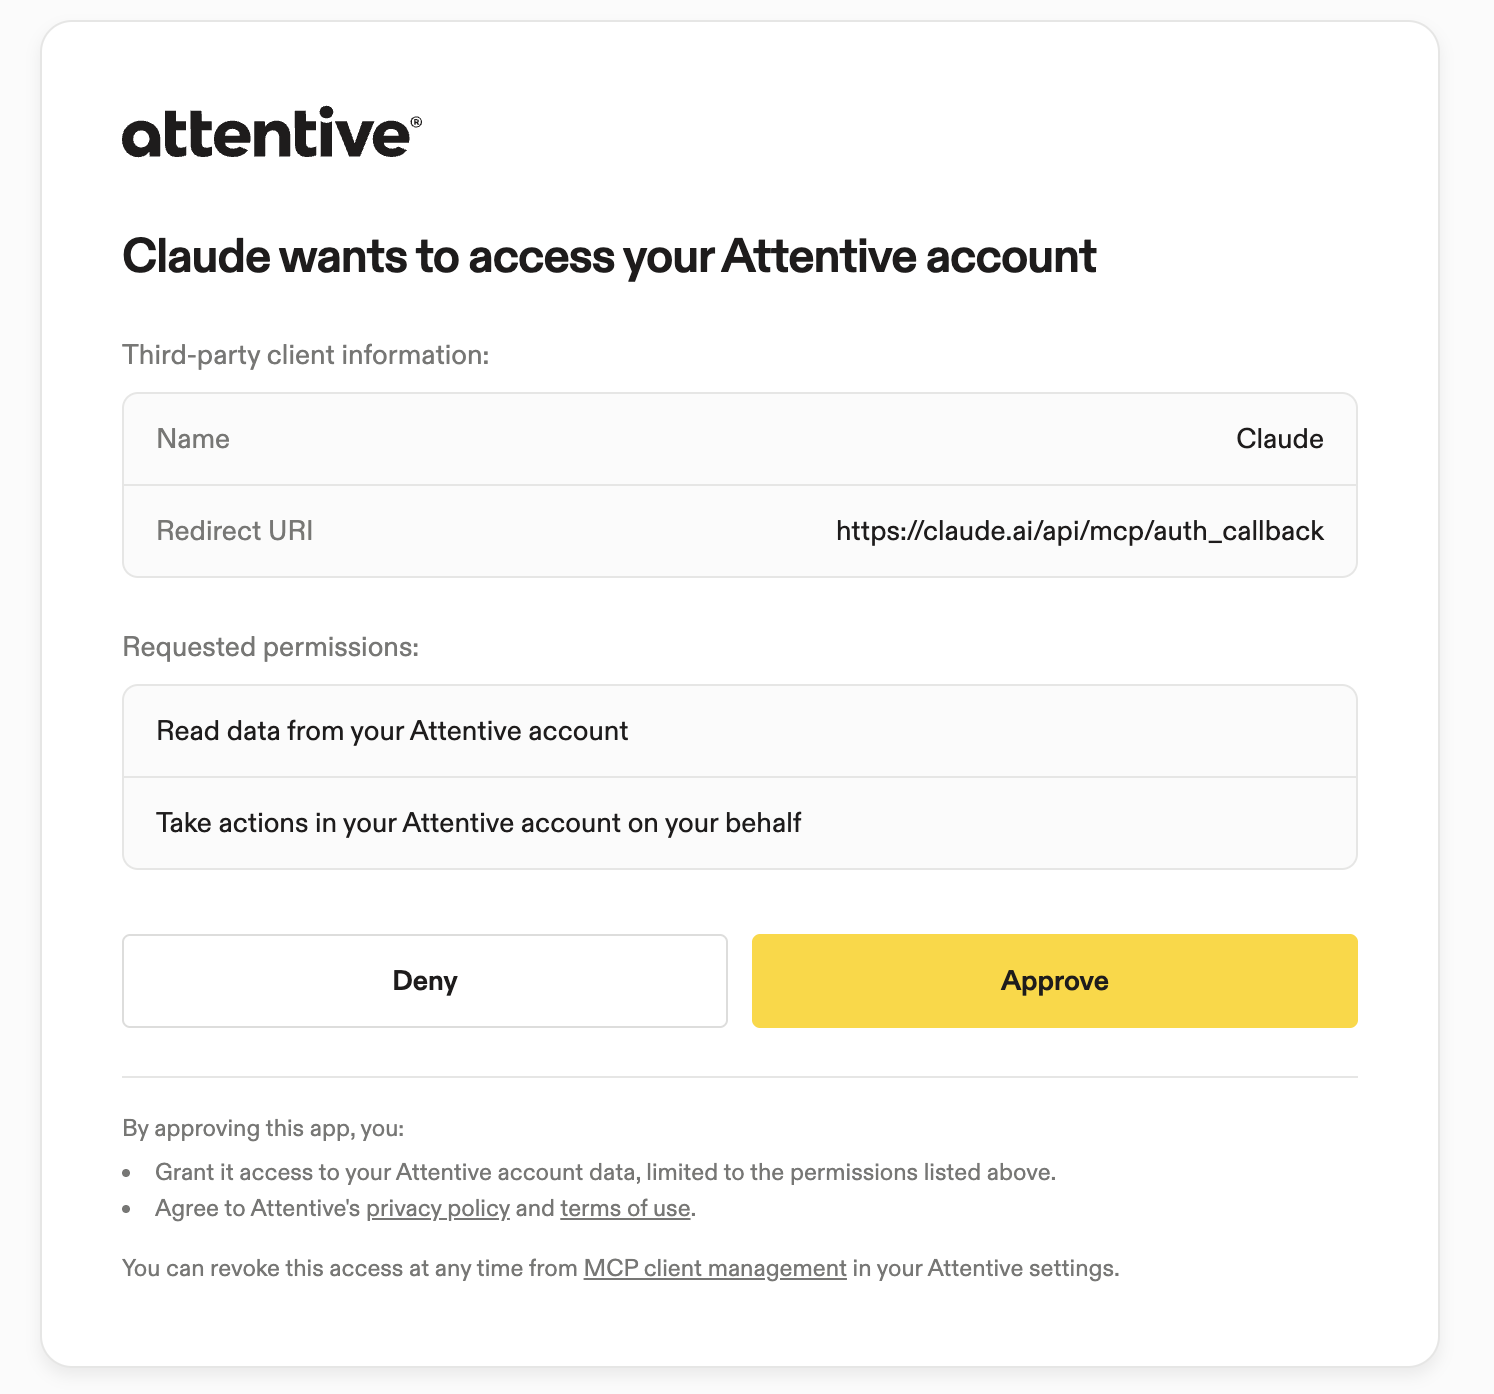
Sign in to Attentive when prompted. Review the requested permissions, then select Approve.
-
Return to Claude Desktop and confirm the connector shows as connected.
Codex desktop app
-
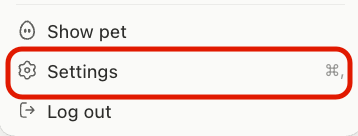
Open Codex, open the profile menu, and select Settings.
-
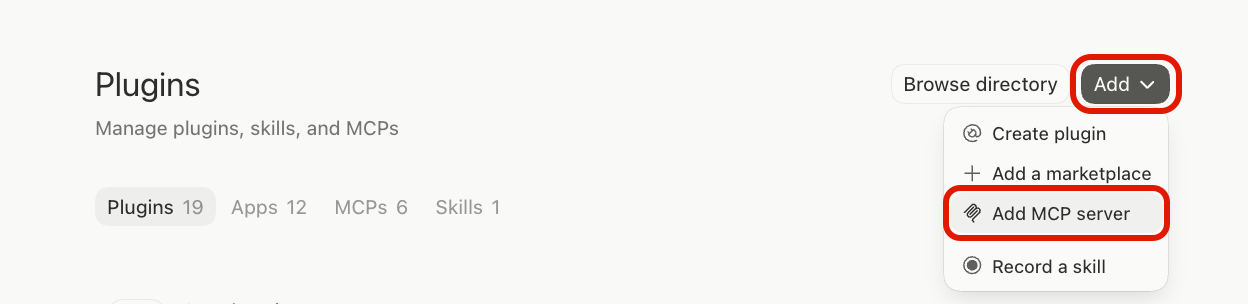
Open Plugins.
-
Select Add, then Add MCP server.
-
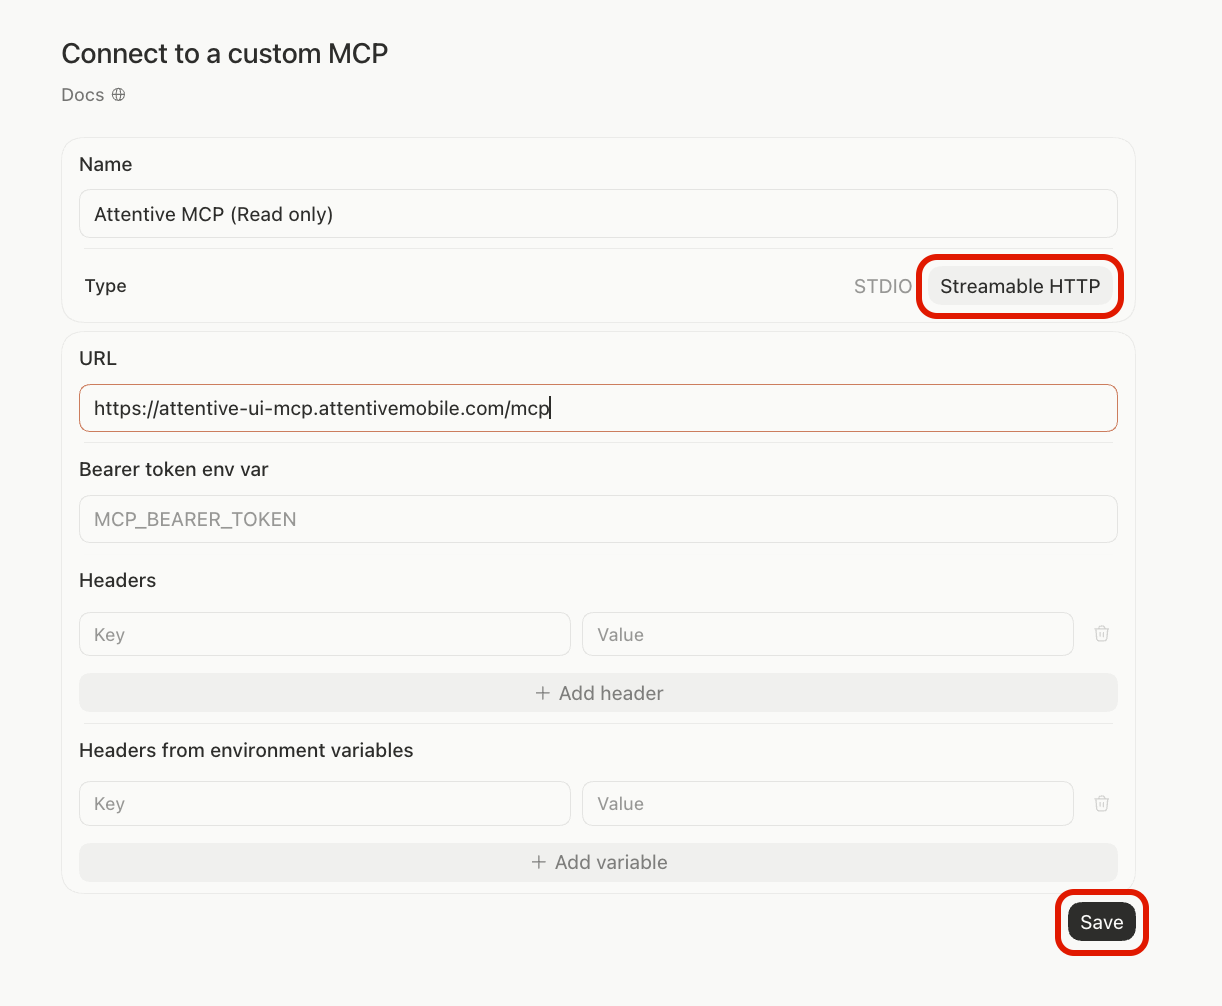
On the Connect to a custom MCP screen, enter:
- Name:
Attentive MCP (Read only)or another name that identifies the connection. - Type: Streamable HTTP
- URL: Paste the read-only or read + write URL above.
- Bearer token environment variable and headers: Leave these fields blank.
- Name:
-
Select Save.
-
Open the MCPs tab and select Authenticate for the Attentive MCP server.
a. Tip: If Authenticate is not visible, start a new Codex task and ask: "Kickstart authentication for the Attentive MCP"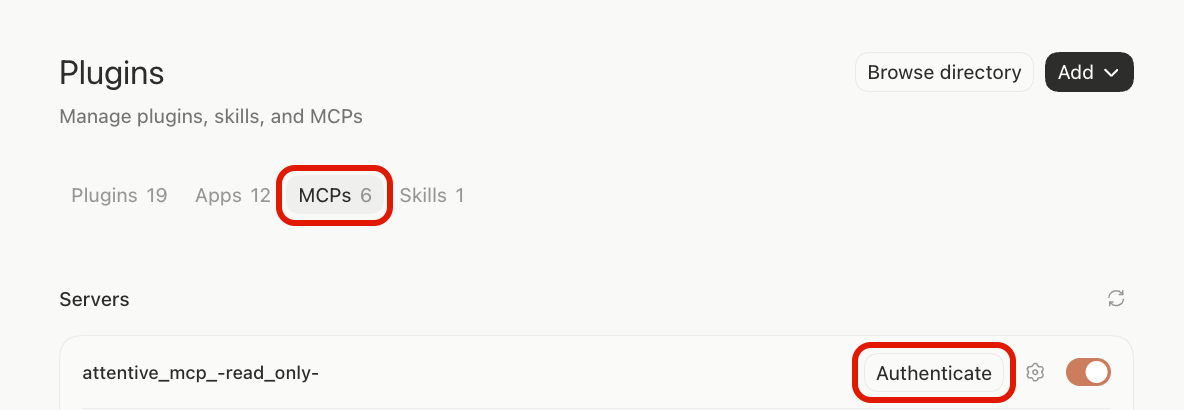
-
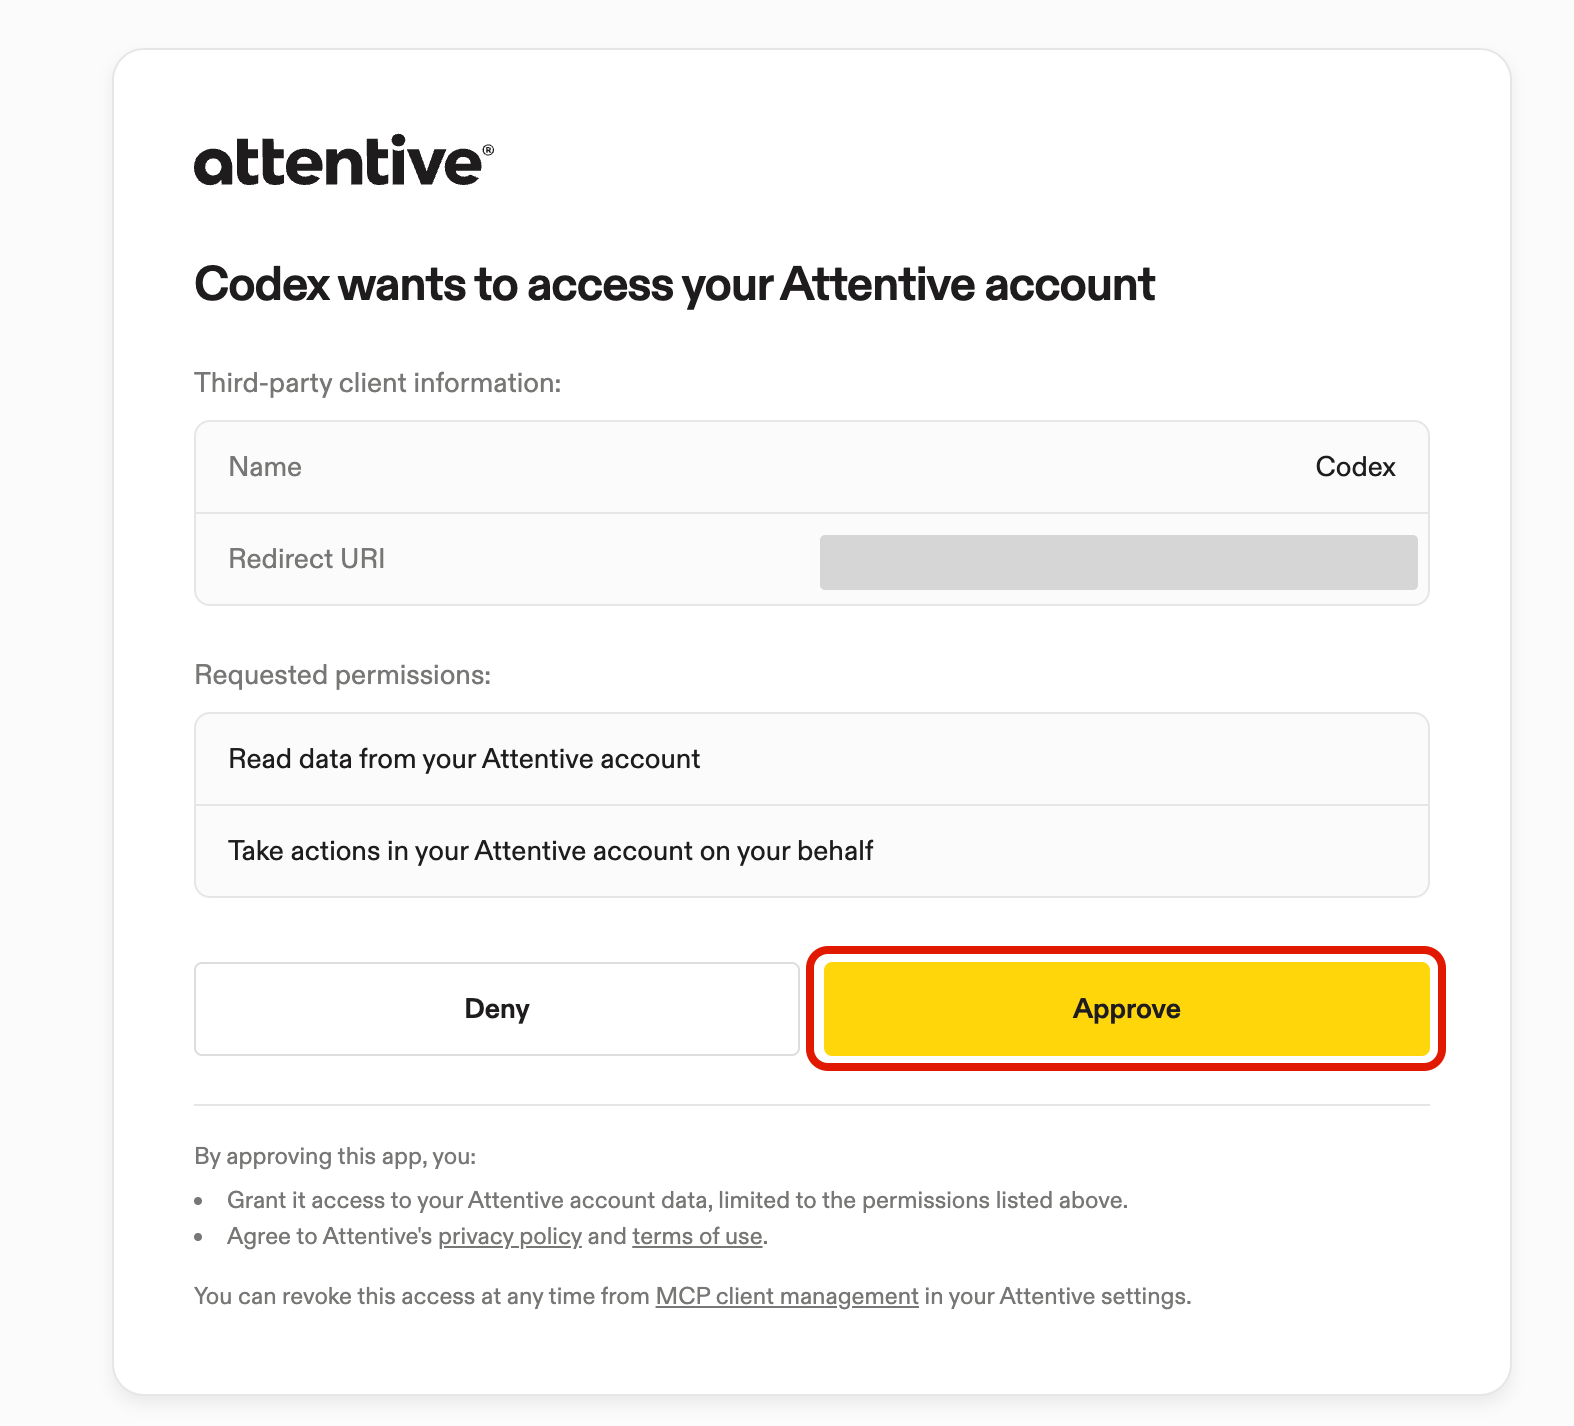
Sign in to Attentive when prompted. Review the requested permissions, then select Approve.
-
Return to Codex and confirm the Attentive MCP server is enabled.
Claude Code CLI
Read-only (recommended to start):
claude mcp add --transport http attentive-mcp --scope user "https://attentive-ui-mcp.attentivemobile.com/mcp"With write actions enabled:
claude mcp add --transport http attentive-mcp --scope user "https://attentive-ui-mcp.attentivemobile.com/mcp?readOnly=false"ChatGPT Codex CLI
Read-only (recommended to start):
codex mcp add attentive-mcp --url "https://attentive-ui-mcp.attentivemobile.com/mcp"With write actions enabled:
codex mcp add attentive-mcp --url "https://attentive-ui-mcp.attentivemobile.com/mcp?readOnly=false"After adding the server, authenticate:
codex mcp login attentive-mcpMicrosoft Copilot
To connect through Microsoft Copilot Studio:
-
Open or create an agent.
-
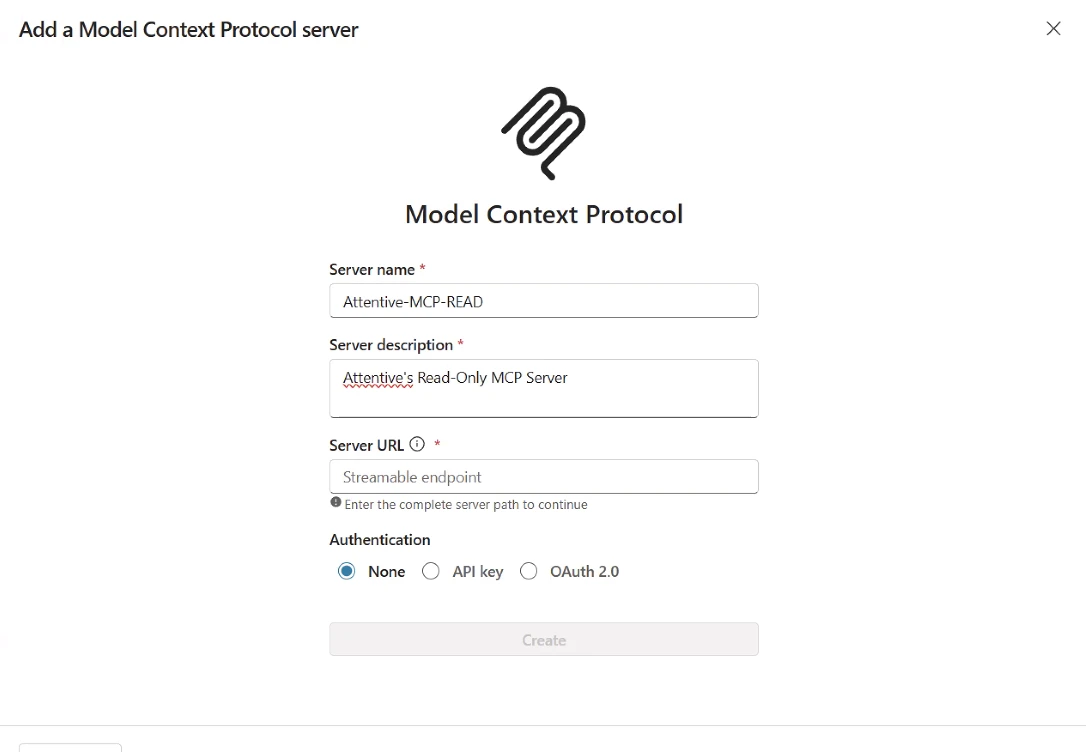
Open Tools, select Add, then select Model Context Protocol (MCP).
-
Enter a name and description, then paste the Attentive MCP URL as the server URL.
-
Select OAuth 2.0 with Dynamic discovery.
-
Create the connection and complete the Attentive login and authorization flow.
Once the Attentive tools appear in the agent, the MCP connection is complete. Refer to Microsoft’s Copilot Studio documentation for testing, publishing, access in the Microsoft 365 Copilot app, and administration.
Other MCP clients
Any client that supports remote MCP servers over streamable HTTP with OAuth can connect. Configure a new MCP server with:
- URL:
https://attentive-ui-mcp.attentivemobile.com/mcp- (append
?readOnly=falseto enable writes)
- (append
- Transport: streamable HTTP
- Authentication: OAuth (the client will open an Attentive login in your browser on first connect)
Refer to your client's documentation for where to add a custom or remote MCP server.
Authenticate and verify the connection
Complete the Attentive login and authorization flow when prompted. Then verify the connection in your client:
- Claude Desktop: Open Settings > Connectors and confirm the Attentive connector shows as connected.
- Codex desktop: Open Settings > Plugins > MCPs and confirm the Attentive MCP server is enabled.
- Claude Code: Run
/mcpand confirm a server namedattentive-mcpappears. - Codex CLI: Run
codex mcp listand confirmattentive-mcpappears.
Once authenticated, the Attentive tools become available to your assistant.
Configuration options
You control the connection by adding query parameters to the server URL. Combine them with &, for example:
| Parameter | Values | Default | What it does |
readOnly | true, false | true | When true, only standard read tools are available. Set it to false to enable tools that change data and sensitive reads that return subscriber contact information, including list_segment_subscribers. |
Because parameters are set when the connection is created, changing them means updating your MCP server entry (or adding a second entry with different settings).
Updated about 2 months ago