Distribute Your App
Distribute your app
You can make your app publicly available for other users outside of your organization to install in their Attentive account. In order to authorize your app to grant access to their Attentive data and features, users will install your app with an authorization flow based on the OAuth 2.0 protocol. This will generate an access token that your app will use to authenticate API requests to Attentive.
After you complete the steps in this article to set up your app for distribution, you can publish your app to make it publicly available in the Attentive marketplace.
You can read our Authentication guide for more information about OAUth 2.0.
You can view an example of an app set up for OAuth flow.
Prerequisite
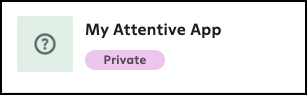
Before you begin, make sure you’ve already created a custom app in the Attentive platform. When your app is first created, it is privately available in your account. It shows a Private status on the App Marketplace page, as shown in the following example:
Step 1. Enable distribution
You must enable your app for distribution in order to share it with users outside of your organization. Complete the following steps to distribute your app:
- Navigate to the integrations setup page.
- On the Built by you tab, click the name of your private app.
- Click the Manage distribution tab, as shown in the following image.

- Enter the Redirect URL for your app. This is where the user will be redirected after the app is authorized.
- Click Generate Credentials.
Your app is now installable, and the following credentials are generated:- Client ID—You will provide this ID at various steps in the OAuth 2.0 authorization flow.
- Client Secret—You will provide this secret at various steps in the OAuth 2.0 authorization flow.
- Distribution URL—This is a URL that you can share with users to install the app in their Attentive account. Attentive auto-generates this URL based on the Client ID, the requested scopes, and the redirect URL you provided previously.
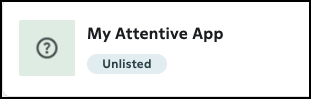
Now that your app is published and distributable, your app should have an Unlisted status on the App Marketplace page, as shown in the following example:
At any point, you can delete your app if you no longer wish to distribute it. Or, you can regenerate the Client Secret for your unlisted app.
Step 2. Set up app installation
After you have an unlisted app, users can install your app using the OAuth 2.0 authorization code grant flow. See Authorization flow for the full details.
Your unlisted app is not discoverable to other users. For users to install your app, you must share the distribution URL. This URL will direct users to an Attentive page, where they can authenticate and then authorize your app.
Distribution URL
Attentive generates a distribution URL for each application automatically, which can be found on the Manage distribution tab (as explained in Step 1).
The URL will be in the form of the following:
https://ui.attentivemobile.com/integrations/oauth-install?client_id={your clientid}&redirect_uri={the redirect uri}
It includes all required parameters. Alternatively, you can generate your own distribution URL.
Required parameters
| Parameter | Description |
|---|---|
client_id | The unique ID for your app, generated when you published the app. |
redirect_uri | The URL you provided. Attentive will redirect the user to this URL after they authorize the requested permissions. The redirect URL must match one that you provided in app settings, and must also be used in the call to get an access token. |
Note: The
redirect_urican have query parameters, but they must match the URL that was provided on the application's Manage distribution tab. Additionally, the redirect URL must be URL-encoded. Attentive will decode the URL to validate it against the saved redirect URL, and this may cause issues in the redirect if the URL is not properly encoded.The
redirect_uricannot hold dynamic data or per-installation data. You can use thestateparam to pass data.
Optional parameters
| Parameter | Description |
|---|---|
state | Allows you to pass dynamic or user-specific data. Attentive will return this value back in the redirect. |
Note: If you provide a
stateparam, we recommend that you use Base64-encode it. This ensures that we send back the value without any modifications.It is also strongly recommended to add
statesince this provides protection against attacks, such as cross-site request forgery. See RFC-6749.
User authorization
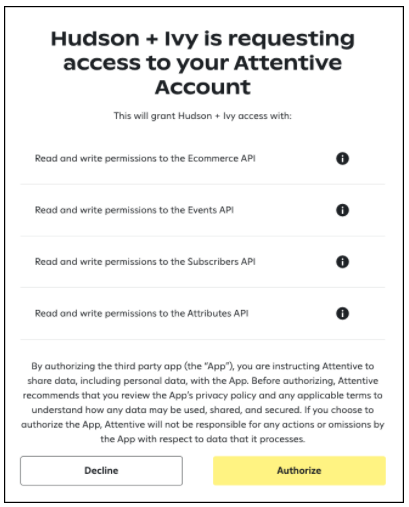
After the distribution URL is set up, it directs the user to Attentive to ensure that the user is authenticated. Then, it prompts the user to authorize the app for the permissions your app has requested. The following image is an example of what a user is shown:
Redirect and token exchange
After users authorize your app, they are redirected to the redirect_uri provided in the distribution URL. A temporary code is generated and passed back as a parameter, as well as any provided state.
Note: If a user declines to authorize your app, they are still redirected to the
redirect_uri, but anerror=access_deniedparameter is added as described in the RFC.
Your app must then use the temporary authorization code to send an access token request to Attentive’s Access Token endpoint. The authorization code will expire after two minutes if it is not used.
Attentive will return an access token. Your application must correlate each access token to each company that installs the app.
After completed, your app can use this access token to make requests to Attentive's APIs on behalf of the company using the app.
Step 3. Test the authorization flow
After enabling your app for distribution, you can test this authorization flow to ensure it works end-to-end. To test, you must have two available Attentive accounts (your production account and a test account). If you do not have a test account, contact our White Glove team or your Customer Success Manager to set it up.
To test the authorization flow, complete the following steps:
-
Click your company name in the top-right corner.
-
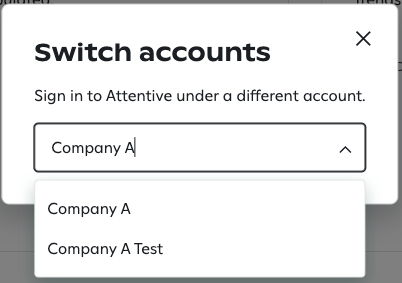
Find your test account name in the Switch Accounts section or click More... and find your test company. The following example shows a user switching to their test account, Company A Test:
-
Click the name of your test account. The Attentive platform is now signed in to your test account.
-
Paste the distribution URL (created from your production account) into a new tab. The authorization page appears as you're signed in to your test account and prompts you to authorize the app.
-
Click Authorize.
Important! The authorize step will fail if your Attentive account is currently set to the same company name as the one that created the application.
The test was successful if you are redirected to the redirect_uri provided in the distribution URL.
Now, the last step is to publish your app to make it publicly available in the Attentive marketplace.
Updated 5 months ago