GTM SDK via Attentive Analytics Template
Google Tag Manager SDK via Attentive Analytics template
Google Tag Manager (GTM) allows for rule-based configuration and insertion of dynamic variables to pass data from your website to Attentive.
Within Google Tag Manager, you have a few different objects to leverage:
- Tags – code that fires
- Triggers – rules that dictate when a tag should or shouldn’t be fired
- Variables – dynamic elements that insert data when tags are triggered. Variables come in multiple forms:
- Pulled from pre-configured dataLayer
- Configured to leverage elements on the page
- Custom JavaScript
The great thing about GTM is that you’ve likely already configured it for an existing partner integration. In addition, it can be managed by a non-technical team, so implementation won’t be blocked by the need to loop in a dev team. Below is a guide for how to do this yourself.
Step 1: Install the base tag
We already have a guide for integrating Attentive with GTM here.
Step 2: Install Attentive Analytics SDK template
- Go to tagmanager.google.com and open the relevant container/workspace for your business.
- Navigate to Tags on the left-hand side of the page.
- Click New.
- Click the Tag Configuration area of the screen.
- Select Discover more tag types in the Community Template Gallery at the top.
- Select the Attentive Analytics SDK template and click Add to workspace.
- Proceed with configuring the current tag.
Note: The template has been downloaded and will also be available to you for future use.
Step 3: Configure Attentive Analytics SDK for product views
- Go to tagmanager.google.com and open the relevant container/workspace for your business.
- Navigate to Tags on the left-hand side of the page.
- Click New.
- On the top-left, replace Untitled Tag with Attentive - Product Pages.
- Click the Tag Configuration area of the screen.
- Select Attentive Analytics SDK in the tag type list.
- Select Product View in the Event Type dropdown menu.
- In the Product section, associate your pre-configured variables to the list of Attentive attributes.
Note: If the variable we need doesn’t exist, you can create a new one by finding the missing data point on-site and then creating the variable within GTM. If you require assistance with this, your Attentive CSM can help.- Standard Attributes:
- Product Name
- Product ID
- Product Variant ID
- Product Image
- Product Category
- Product Price
- Currency
- Quantity
- If available, it’s helpful to configure:
- User Email
- User Phone
- Standard Attributes:
- Expand the Advanced Settings section.
- Go to Tag Sequencing and select Fire a tag before Attentive - Product Pages fires.
- Select Attentive Tag as the Setup Tag.
- Click the Triggering section area on your screen.
- Select the relevant trigger for this event tag.
Note: Ideally, you’ll have a Product Page trigger already configured. If you don’t, we can offer support to help build the trigger in GTM. This process isn’t very complex. It involves finding a value/object in the dataLayer that indicates the page is a product page. - Click Save.
Step 4: Configure Attentive Analytics SDK for add to cart events
Above we covered how to configure for product views. You can follow the same configuration flow here, with the following differences:
- Configure a trigger to only fire add to cart events when someone adds an item to their cart.
- Add to cart events don't require tag sequencing configuration. (You can skip step 9 above).
Step 5: Configure Attentive Analytics SDK for purchase events
You can follow the same configuration flow as product view events (including tag sequencing), with the following differences:
- Configure a trigger to only fire purchase events on your order confirmation page.
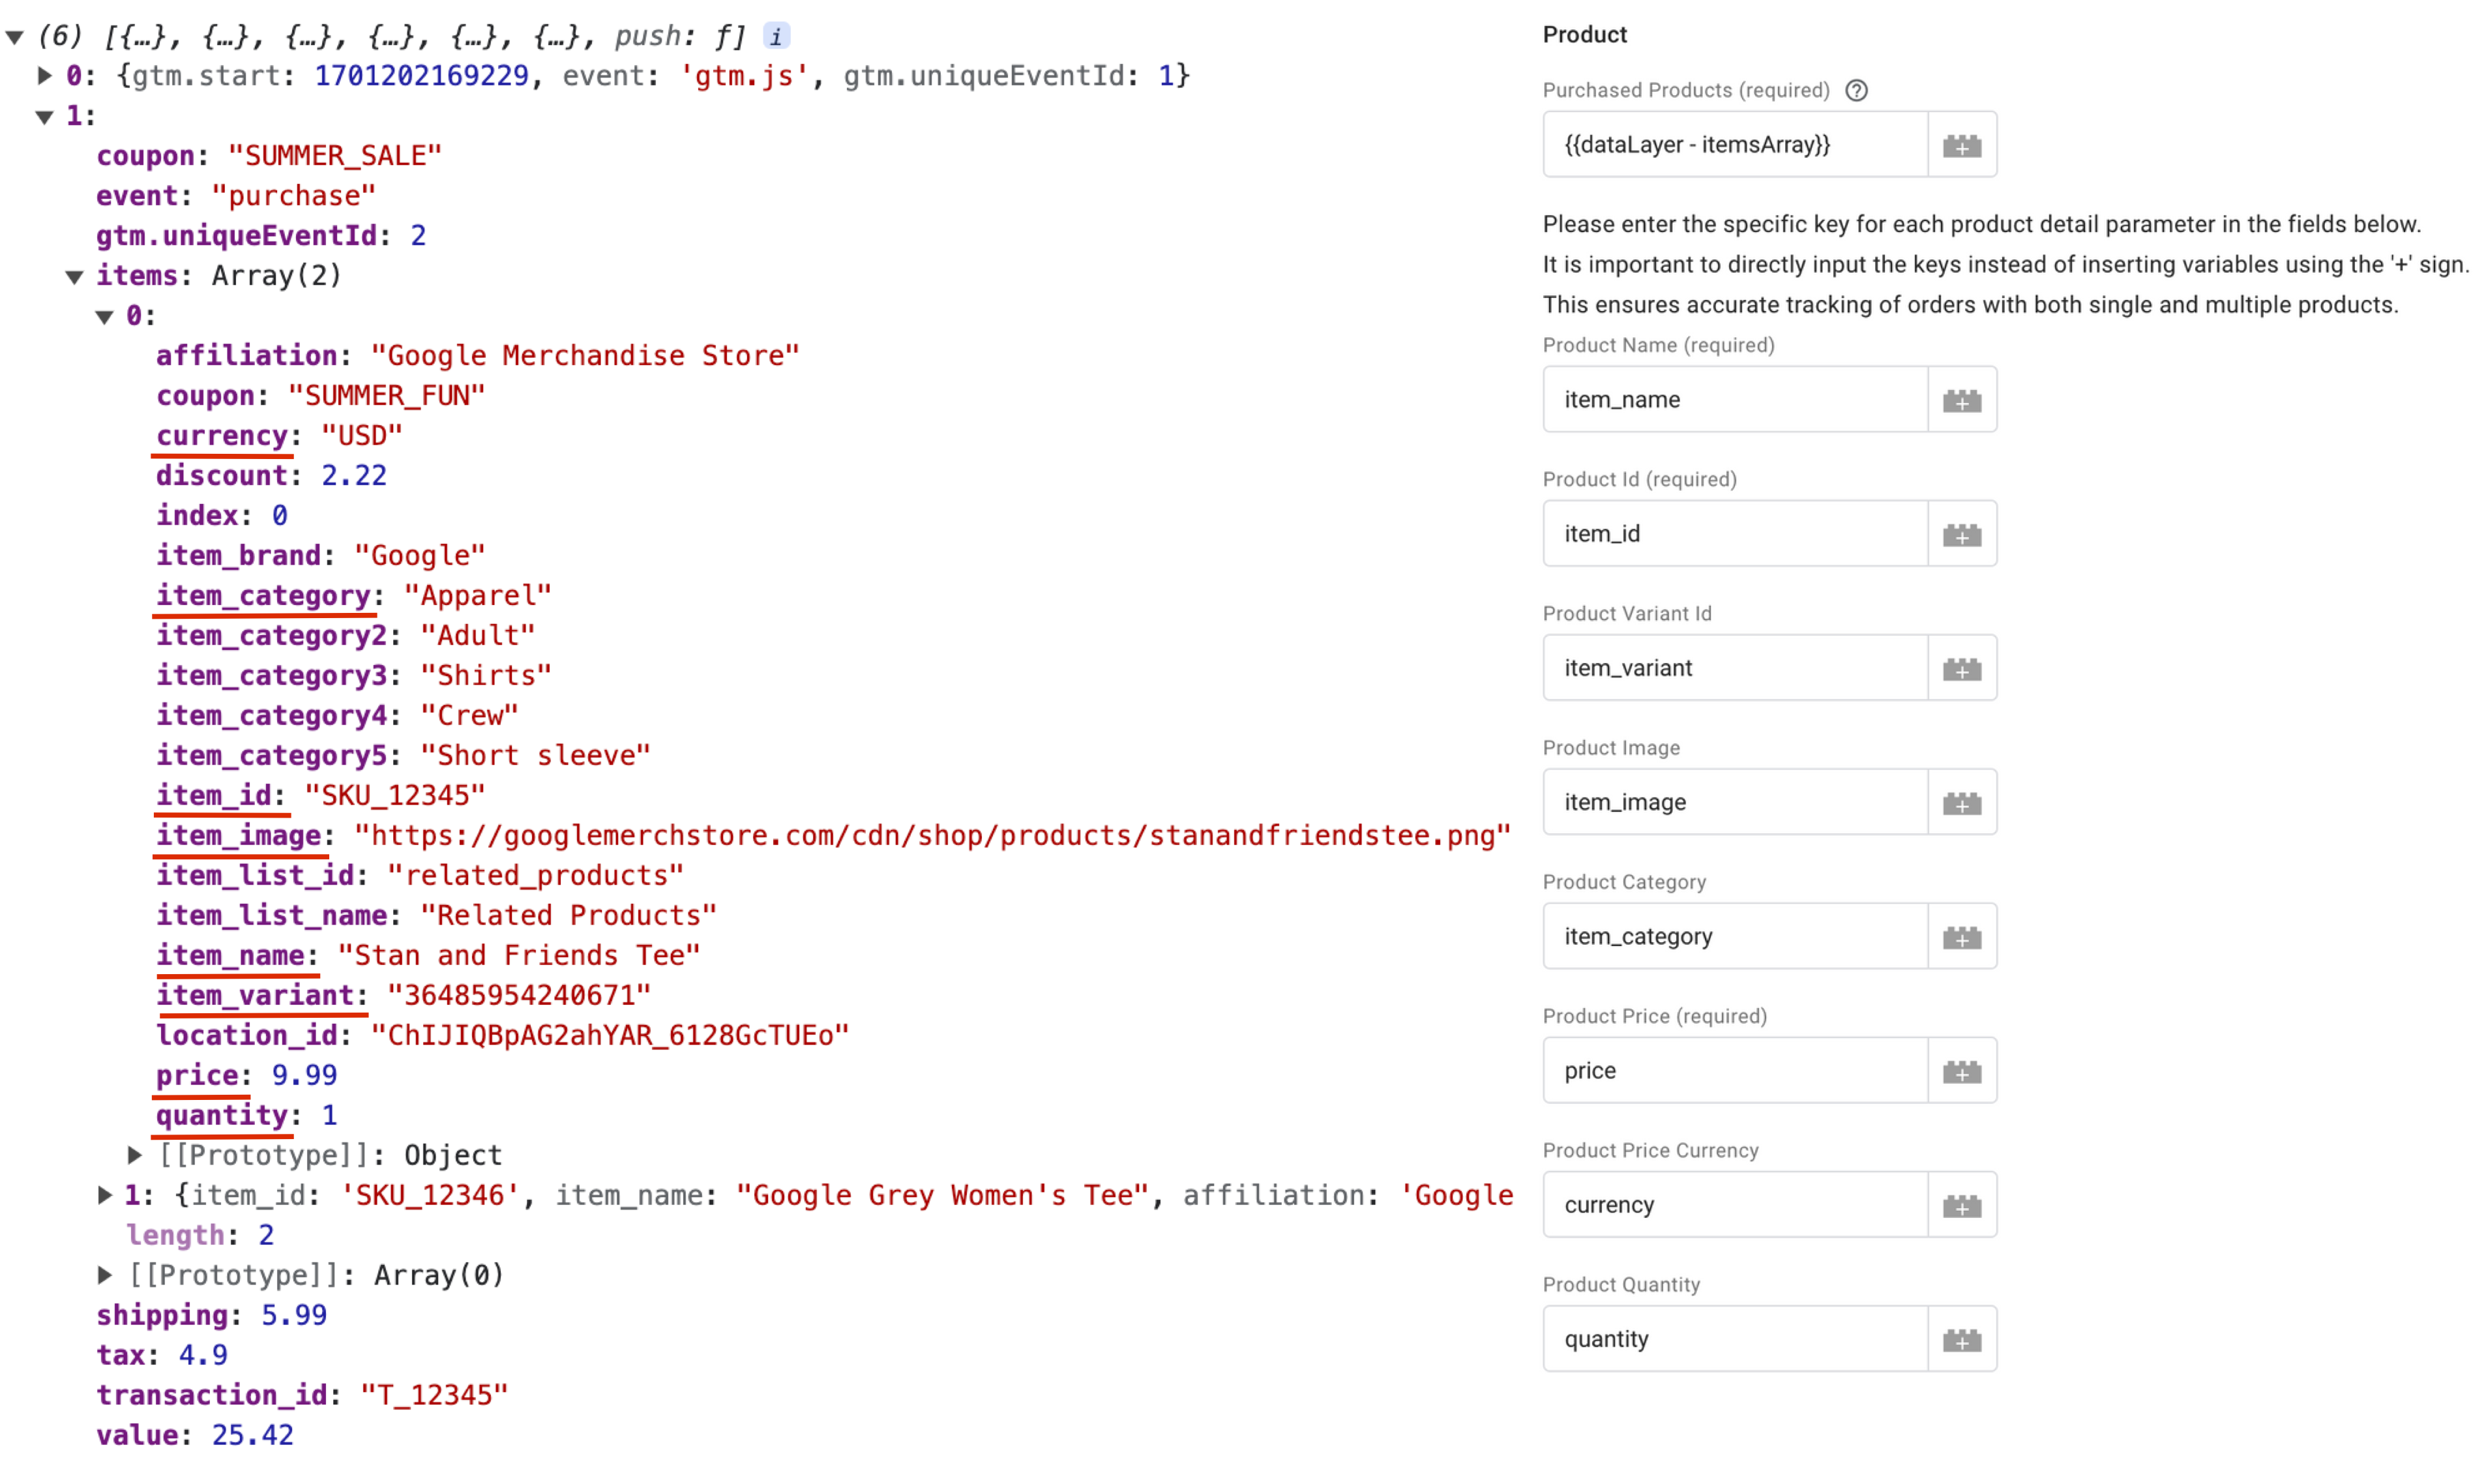
- In the Product section of the tag configuration:
- Select the variable for the array containing purchase products.
- Enter the specific key for each product detail parameter.
Notes:- It’s important to directly input the keys instead of inserting variables using the '+' sign. This ensures accurate tracking of orders with both single and multiple products.
- In the screenshot below, note the underlined keys on the left are equal to the values inserted on the right.
Updated 26 days ago